Induction cooktops are now a very familiar term in today’s modern kitchen world. It has slowly but surely started replacing conventional cooktops.
Before we begin, let me break down induction cooking into simpler words.
We all are aware that friction creates heat. We have been taught since childhood that rubbing our hands in the cold season keeps them warm.
The faster we rub the warmer the hands become.
Following the same principle, instead of friction being created in hands, it is created by the electrons inside the cookware.
While gas or electric cooktops require turning on a heat source, induction cooking makes a heat source out of the cookware itself.
While I cover how induction hobs work and how to use these in detail later in this article, let me quickly give you a quick overview.
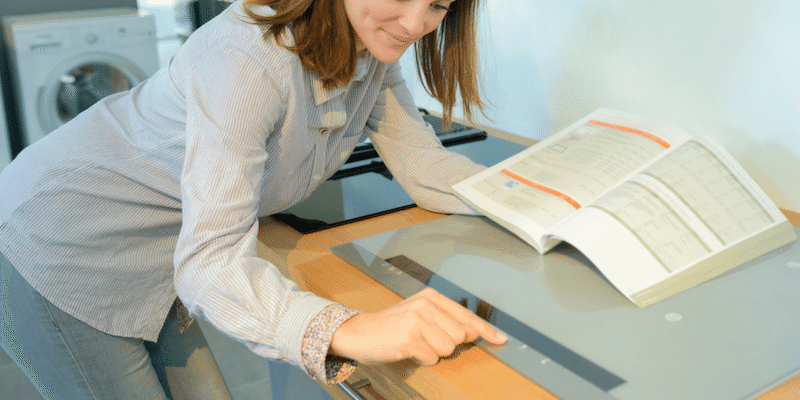
Here is how to use an induction cooktop/hob:
- Switch ON the induction hob unit.
- Place your induction pan/cookware on the cooktop ring that you want to use.
- Locate the Power switch on the induction cooktop and press it to switch on the appliance.
- Selecting the sensor meant for the ring you wish to use (in case you have multiple burner cooktop)
- Use the + and – sensor buttons to adjust the heat.
- Once done with the cooking, hold the power button again to turn off the induction cooktop.
Remember that no heat is generated by the induction hob when there is no cookware placed on the cooking ring.
If you’re looking for an easy-to-use, durable, and energy-efficient induction cooktop, I suggest checking out the Max Burton Induction cooktop. It has many presets for a one-touch cooking experience. It also has digital temperature control, safety shutoff, and works with all induction-friendly cookware
How Induction Works?
The word induction is a short form of electromagnetic induction.

When induction is powered on, an electromagnetic current begins flowing through a copper coil also called the heating element.
When we place induction-compatible cookware on top of induction, the currents will pull the electrons from the cooking pan into a formation.
The electrons react stubbornly and try to resist the formation. This constant pull and push of the electrons create friction inside the cookware.
It is also called a resistive electric current. This resistive electric current creates heat and this heat generated cooks the food.
The cookware must be magnetically conductive and ferromagnetic for the induction system to start its work.
Why Choose an Induction Cooktop?
The induction cooktop is a super-efficient, smart, quick, and safe method used for the purpose of cooking food.
It gives you an easy cooking experience. All you have to do is press a few buttons and the induction takes care of the rest.
The speed at which it cooks food surpasses gas and electric cooktops. Induction cooking gives you precise temperature and power control.
The temperature and power can change from high to low within seconds.
The most promising feature is that it cooks evenly all over. So there are no overcooked and undercooked parts of one dish.
It can be easily switched on and off and only requires a working socket.
It is way more energy-efficient than gas or electric cooktops. Here the heat remains confined to the cookware and the place beneath called the heating zone or burner.
The rest of the cooktop remains cool to touch.
Forget hot sweaty times in the kitchen. Due to the absence of flame and burners, it does not dissipate a lot of heat into the environment, keeping the kitchen and chef cool.
It is super easy to install and can be fixed at a lower or higher setting depending on the height and needs of the family (handicapped/wheelchair-bound).
It also comes in a portable form that can be carried around and used anywhere indoors, outdoors, dormitories, etc.
It is super easy to take care of it, does not require any raw materials, and is easy to clean.
The most important thing- leaves you feeling relaxed and refreshed while it takes care of the cooking for you.
Induction cooktops are also being used in commercial establishments.
Whether it be restaurants, food carts, or trucks, the food is prepared in a jiffy with the help of induction after the customer chooses their option from the menu.
The freshness induction provides unparalleled and gives rise to profits for the owner.
Rather than precooking and serving, induction has helped restaurants to ace their game.
It also leads to less food being spoilt as there is no need to prepare in bulk beforehand.
Enough of singing praises. I have been speaking for quite some time about Induction cooktops.
I have told you what it is all about, its workings and the advantages you get if you use it.
Let us move on to how to actually use the induction cooktops/stoves.
Also read: Do Induction Cooktops Crack Easily?
How To Use An Induction Cooktop?
Using an induction cooktop is as simple as pressing some buttons. With a little bit of know-how, you can easily use an induction hob in your day-to-day work.
In this section, I will cover all the steps and things you need to know to use an induction cooktop.
Getting Started with the Induction Cooktop (Installation)
The induction comes as a fixed or portable device. It needs to be unpacked and installed in case of fixed.
After installation, it is ready to use.
In the case of fixed, usually, the company sends in their labor to help install it properly.
You can tell them to adjust according to the height and place you desire. If that option isn’t there, make sure to get it installed by a certified technician.
Make sure to read the manual which comes along with it to find out its required voltage and current and other specifications. Follow the manufacturer’s instructions
After placement, check for the ceramic glass surface. It should not have any cracks or defects in workmanship.
If you happen to see one, immediately seek replacement with the company.
Most of the inductions come with a warranty of one year in which they cover defects in making and workmanship.
In the same way with the help of the owner’s manual, check the function buttons to see if all are working properly.
Cookware For Using On An Induction Cooktop
Before starting to cook, you need induction-compatible cookware.
Related: How to Check If Your Cookware in Induction Ready?
If you are purchasing cookware from the market for your induction, check for the induction-friendly mark.
The cooking vessel should be flat, smooth, and magnetic.
Induction friendly means it must be made up of ferromagnetic material for the induction process to work on it. Magnetic grade of stainless steel, iron, cast iron, and enameled cast iron and steel work best.
Materials that will not work on the induction are glass, copper, and aluminum unless their base has magnetic properties.
A good method to check is to place an ordinary fridge magnet at the base of the cooking vessels. If it sticks, the cookware will work on induction.
Some people recommend the use of an interface disc between non-induction vessels and induction cooktops.
It is a magnetic plate kept in between the two for cooking.
The downside of using an interface disc is that the cooking will take place slowly as the heat has to be transferred from the cooktop to disc and from disc to the vessel.
Heat loss is more. Also, the disc heats up to a high degree in an effort to transfer heat which can damage the cooktop underneath.
So unless there is no other way, I would not recommend you to risk using an interface disk.
Coming back to the quality of cookware, choose a smooth base for maximum contact with the cooktop surface.
Avoid those with big dings and dents.
Use flat-based cookware for an even cooking area.
That is unless you have purchased a sunken wok zone model. Yes, I know. Such cooktops are new in the market but they are available.
Apart from them, use a wok with a flat base (lots of options for that too in the market).
Do not use thin or low-quality cookware. It will produce a lot of noise while cooking.
If you’re interested, I have compiled a list of the best induction cookware to help you get the right ones.
In some units, very small pots and pans will not be detected. Again refer to the manufacturer’s instructions in the guide.
Usually, the minimum base size is 4 to 5 inches depending on your hob.
The maximum base size is 12-14 inches again depending on your company model. There is also something called “ element bridging” by syncing two or more burners.
It is very effective to keep griddle and cook and also large diameter vessels on such cooktops.
If you have a big family gathering often and like to cook for a lot of people, there is something called zoneless units which take the shape and size of the vessels you place on the cooktop.
Lastly, it is not a good idea to use spoons made of stainless steel, iron, etc while cooking on induction. Use wooden spoons.
Using the Induction Cooktop While Cooking (Step By Step)
Once you have the cooktop installed and the induction-ready cookware, you’re all ready, to begin with, the cooking.
Placement of cooktop and cookware
- Place the cooktop in a flat, stable and non-metallic surface. Make sure to leave around a 3-5 inch gap all around the induction to avoid blockage of air vents.
- Now, wipe the bottom of the cookware. keep the food to be cooked in the cookware and place the cookware on the heating zone according to the size and shape of the vessel. To prevent spillage, place a lid on top of cookware. Cooktops can have one, two, three, four and five heating zones depending on the design of the cooktop.
- Four zones are very common in the US. Cooking zones in most cooktops are defined and have clear guidance for the size of cookware suitable for particular zones. Choose an induction cooktop with an extra-large, flexible and small cooking zone. These are better matched to a variety of cookware sizes.
- While placing, align with the center of the heating zone with the help of a ring drawn on the top surface of the cooktop. To avoid scratches and thumps to the glass surface, lift and place and lift and remove. Do not drag the utensils on the glass surface.
- Plug the power cord into the electrical socket. Keep all objects which can be affected by a magnetic field like a credit card, TV, radio, digital meat thermometer away from the induction. Patients having cardiac pacemakers and other devices sensitive to the magnetic field must take the advice from their physician before operating the induction.
Induction gives out EMF (electromagnetic field).
According to guidelines by ICNIRP, a distance of one foot should be maintained between the cook and the cooktop to avoid the ill effects of EMF.
It is found after that distance the emf exposure is negligible and not harmful. Some cooktops have an antimagnetic wall that ensures safety from magnetic radiations.
The reason we are placing the cookware before switching the induction on is to avoid any stray EMF.
Also because some cooktops start beeping as soon as they are switched on and want the cookware to be placed within 20-30-60 seconds or they switch off to conserve energy.
Using the Controls in the Induction Cooktop
The next step is to start working on the control panel for cooking. Each induction has its own control panel with a unique set of functions.
There are primarily three types of switch controls in the control panel of the Induction.
A rotating knob control, a press button control, or a touch sensor control.
Switch on the induction by pressing the on/off button according to the instructions in the guide menu.
The control panel has the following buttons to help you with cooking.
Power buttons, temperature buttons, timer buttons, + and – buttons to increase and decrease the power/temperature/time.
An LED display panel for you to read the values and monitor your cooking temperatures, powers, timings, etc. for the feel of flame, some high-end inductions feature LED flames to give a visual idea to the user about the heat.
The inductions are made up of different power and temperature settings from low to high. The timers also vary in inductions.
The maximum time for induction to work in most inductions is 2-3 hours after which it will shut down.
Regarding power settings, in some inductions, there is a power management system that divides the power between cooking burners in a pair.
This means the maximum power function can only be set for one burner in one cooking zone.
The other burner in the same cooking zone will display low power. If you want to cook two dishes with maximum power setting together, they need to be in opposite zones.
Set the power/ temperature and timer according to the instructions in the manual.
Most of the cooktops come with an inbuilt timer ranging from 1 minute up to 170 minutes with 1-minute increments.
Since the induction cooktops heat up quickly and maintain power and temperatures evenly, it will take time and practice before you become an expert at induction cooking.
While cooking the food if the cooktop displays errors, read the instruction booklet and fix the problems. If it persists call customer care or your dealer.
Additional Feature Buttons
Below are some of the common settings you will find on most induction hobs
Preset Menus
Lots of inductions come with preset cooking menus. They are set for defined heat and time for each food.
The most common menus are warm, hotpot, boil, steam, stir, fry, grill.
All you have to do is choose the menu button you wish and let the induction take care of the heating and timing.
Wifi or Smart Device Control
They are present in higher-priced inductions.
They offer the user the option of managing the setting with the help of a remote.
Child Lock
This safety feature is an asset for most cooktops. Especially if you have children around the house.
With the help of this feature, all the buttons will get locked and the program will continue to run.
It avoids any accidental change in settings by the user or children.
To activate it, in most cooktops, you have to press the child lock for three seconds and to deactivate the press again for three seconds.
Refer to the manual to see the exact method for activation and deactivation.
Pause Button
This again is a safety feature with the help of which the program settings can be paused, meaning cooking can be paused, and then when pressed again, it will resume the cooking process.
Especially handy in case of spills. A quick pause, wipe away, and resume cooking.
Also if there is something important you want to do urgently, this button comes to the rescue.
Delay Set Button
With the help of this button, cooking can be delayed to another time in the future.
It comes in use especially if one is multitasking and forgets, the induction remembers the set time and cooks the food according to your chosen settings.
Wok Cooking
Some high-end inductions come with a depressed area specially designed for the wok.
Follow the instructions on the manual for wok cooking. Wok cooking is used for stir-frying, pan-frying, smoking, steaming and roasting.
Residual Heat Light Indicator
Most of the inductions feature a residual heat light indicator. After the cooking is over, the cooktop remains hot.
The light is a signal to not touch the cooktop.
Wait for the light to stop flashing or for the hot sign to turn cool before touching the cooktop for cleaning.
A fan will run underneath cooling the induction and once it is cooled down, you can safely clean and store the induction.
Also read: Empava Induction Cooktop Reviews
Induction Cooktop In-built features Explained
In this section, I will tell you about some of the inbuilt features and their meanings.
Automatic Pan Detection
This means the induction has an inbuilt sensor that detects if cookware is kept on it or not.
Depending on inbuilt sensors, some beep and shut down within 20-30-60 seconds if no cookware is sensed on top of the glass surface.
Also if at any time during cooking you lift the cookware, it will again sense the absence and shut down.
Some inductions will start again to the same setting if you place the cookware back and some will need you to put all the settings again and start the cooking process again.
Safety Cut-off
Almost all inductions have a safety cut-off feature.
If the cooking zone is switched on for an extended period of time without the temperature being altered, it will cut off or switch off automatically.
The period of time required to prompt the safety cut-off depends on the heat settings of the cooktop at that time.
The lower the setting, the longer the cooking zone will remain on.
For example, certain food varieties require very low sim for many hours. So on very low heat settings, some cooktops will remain on for up to 10 hours.
On the other hand, cooktops using the maximum highest settings will automatically switch off after one to one and a half hours.
If your cooking habits require continuous cooking for a long period of time, opt for a cooktop with longer safety cut-out periods.
Overflowing Controls
This safety feature is embedded for the protection, as the name suggests, for protection against overflows.
The cooktop will beep and shut down.
Voltage Fluctuation Detection
Some inductions come with a voltage detector sensor and warn the user when the voltage fluctuates after which it shuts down.
Switching Off
In the case of preset programs, the cooktop will automatically shut down once the process is complete or go to sleep mode.
In some cases, the induction will beep to remind the set timing is over and one has to press the off button.
After cooking is over lift away the cookware and wait for the cooktop to cool down.
Ideally, it takes 3-5 minutes while an inbuilt fan runs. Wait for the residual heat light indicator to stop flashing or to change from hot to cool. Now the cooktop is safe to clean and store.
Remove the switch from the socket.
Planning to buy an induction cooktop? Read my complete induction cooktop buyers guide where I cover all the things you need to know before buying one.
Cleaning And Storing Induction Cooktops
Clean the induction cooktop by rubbing with a wet pad/paper tissue along with mild soap or a specialized cream.
You can also use a toothbrush to rub. Wait for some time.
Since the surface is mostly glass, use a soft cloth to avoid scratching the surface.
Never immerse in water as it’s an electrical gadget. Remove the excess cream with a damp cloth and wipe dry with a dry cloth/pad/towel.
For stubborn residues use a specialized scrapper at a 45-degree angle or specialized creams.
Use the scrapers meant for glass and ceramic and do not apply much pressure. For hard stains, use white vinegar.
Dab the cloth with white vinegar and rub the area. Follow with wiping with a wet towel. Lastly, wipe with a dry cloth.
Follow the instructions in the manual. Always wipe dry and make sure the induction is dried thoroughly before storing it.
To increase the life of the induction, place a cover on it and store it when not in use.
With this, I say adieu and hopefully, I have managed to finish off your hesitation to use an Induction cooktop.
Now that you have understood how to use this easy, user-friendly, and modern technology in your kitchen, go ahead open up your induction from the packing, and start using it like a pro.
All the best!
You May Also Like the Following Articles:
- Best 30-Inch Induction Cooktops
- Best Non-Stick Pans for Induction Cooktops
- Advantages of Cooking with Induction Cooktop
- Pros and Cons of Induction Cooking
- Induction Cooktop Vs Electric Cooktop
- Induction Cooktop Vs Gas Cooktop
- Does Cast Iron works on Induction Cooktops?
- Can Induction Cookware be used on Gas Cooktops?